Module 1: How Administrators configure Immuta to Work Natively with Amazon Redshift

ABC Corp currently uses Amazon Redshift and there is already well-defined roles for controlling access to Data. Can Immuta work with this existing structure? Let’s find out…
In this module you will:
- Access and validate the Lab Environment
- Create three Redshift Users (for Anne Analyst, Manny Manager, and Owen Owner) & Create and Populate the credit_card_transactions table in Redshift;
- Configure Immuta’s Native Integration with Redshift
| 1.0 Access and Validate the Lab Environment |
|---|
In order to complete this Lab, AWS will provision a dedicated account that will be setup with the following services:
Redshift Cluster (Empty)
Immuta Instance (Partially-Configured)
Since this is a temporary on-demand environment you will be given access when it is provisioned via a hashcode that will be emailed to you. You will have 4 hours to complete the lab before the environment will be deleted.
In the steps below, we will access the environment and make sure we can log into these services.
| Steps: | Instructions: |
|---|---|
| 1. Get your “Event Engine” Hashcode (e.g. 8291-1a5f66a314-93) |
Hashcode will be sent to your Email from AWS. |
| 2. Use the Hashcode on the Dashboard to login 3. Choose Email a One-Time Password (OTP) |
https://dashboard.eventengine.run/login 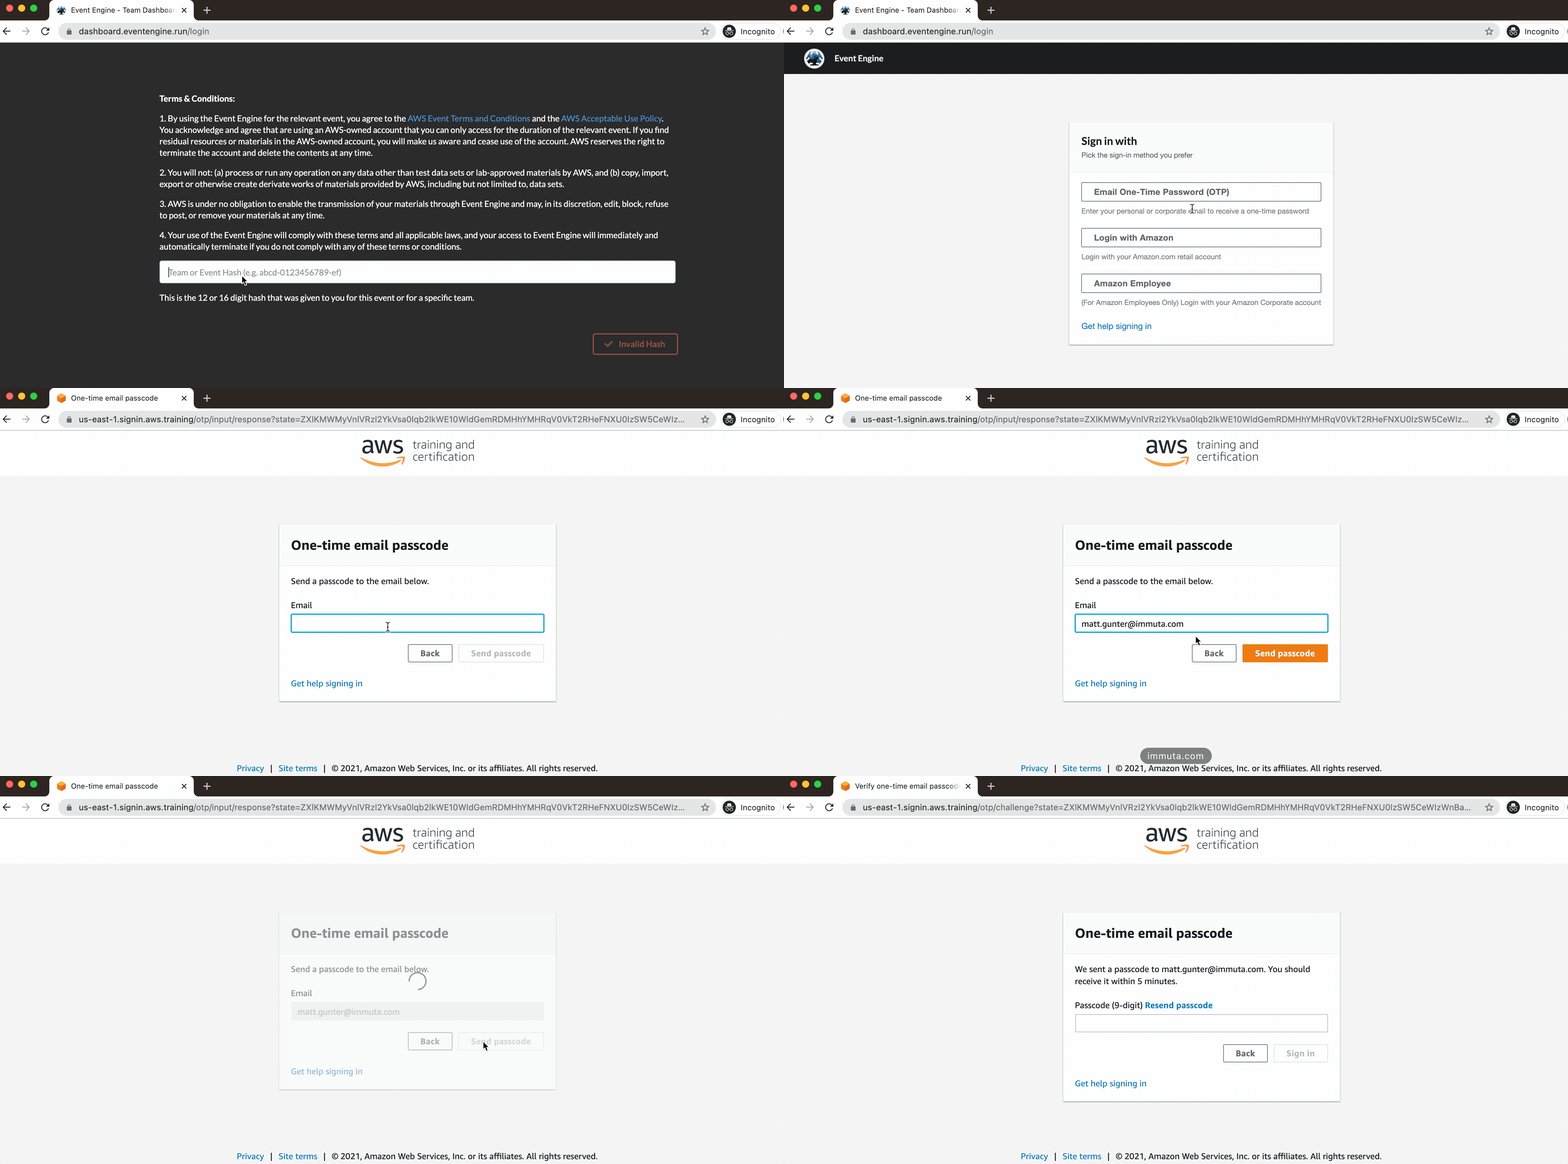 |
| 4. a One-Time passcode is sent to your Email 5. Enter the One-Time Passcode and open the AWS Console |
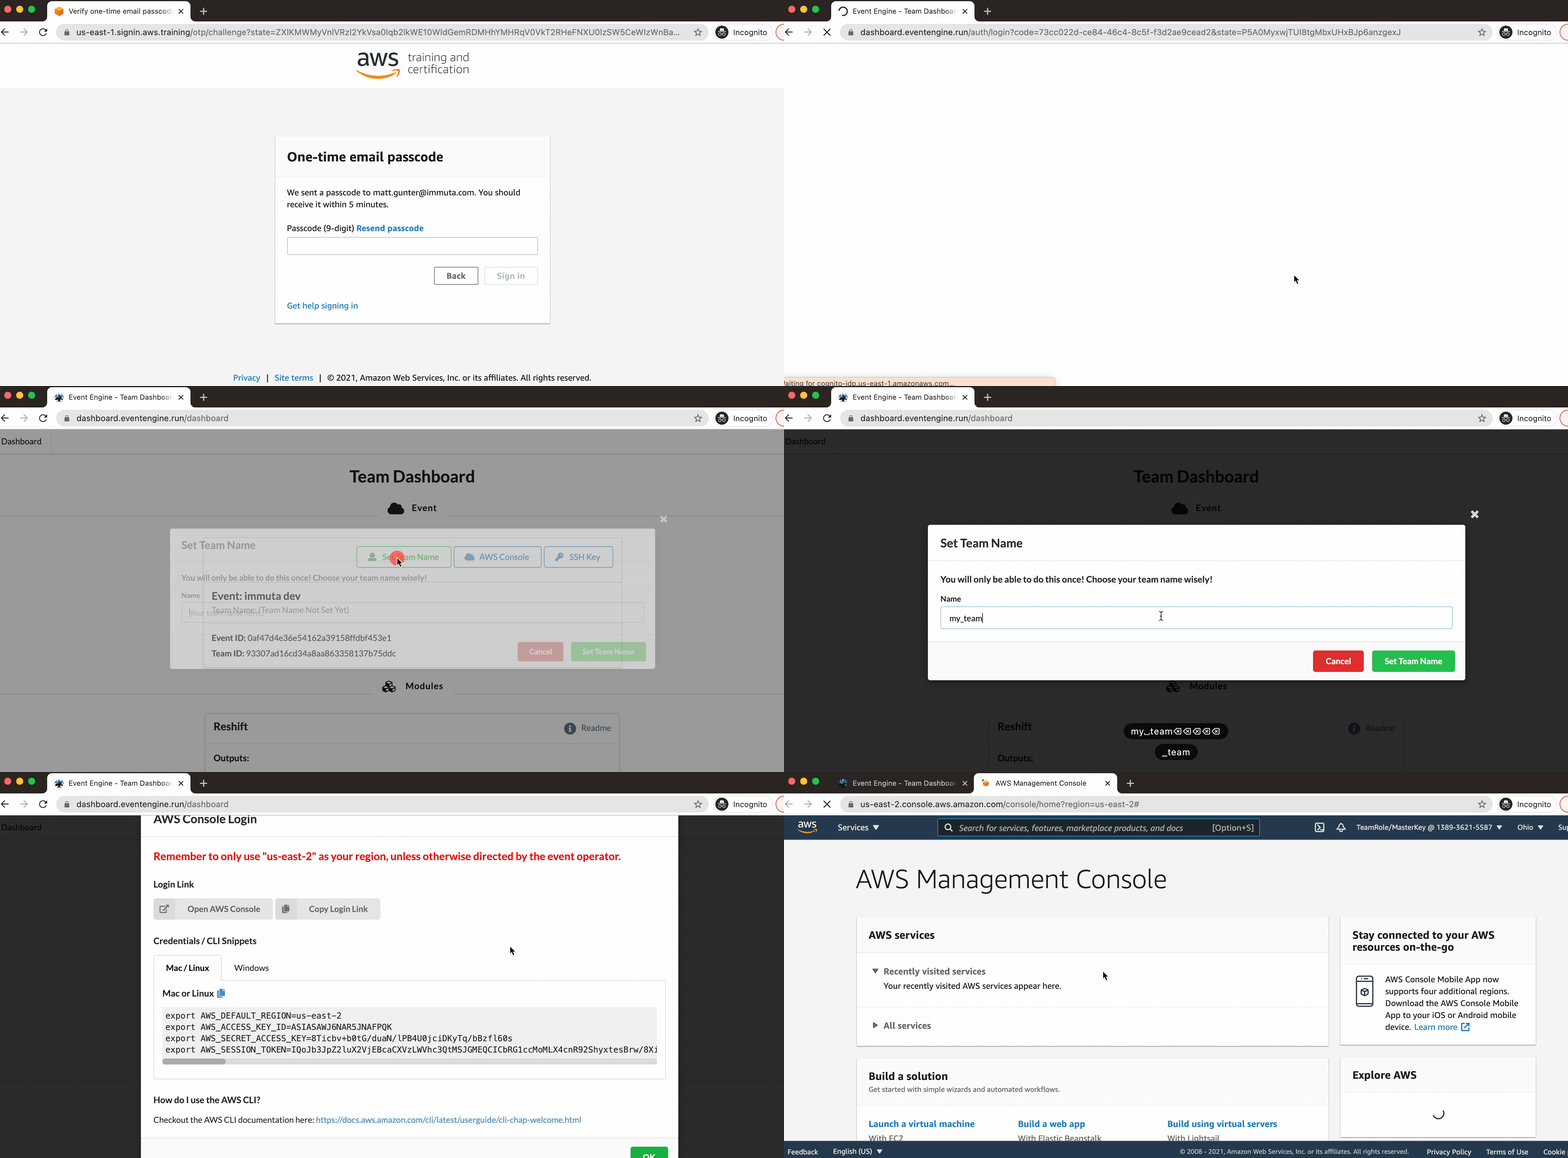 |
| 6. Login to Immuta 7. Login to Redshift |
Immuta is a publicly exposed EC2 Instance, Login with ImmutaAdmin@immuta.com and ‘password’ 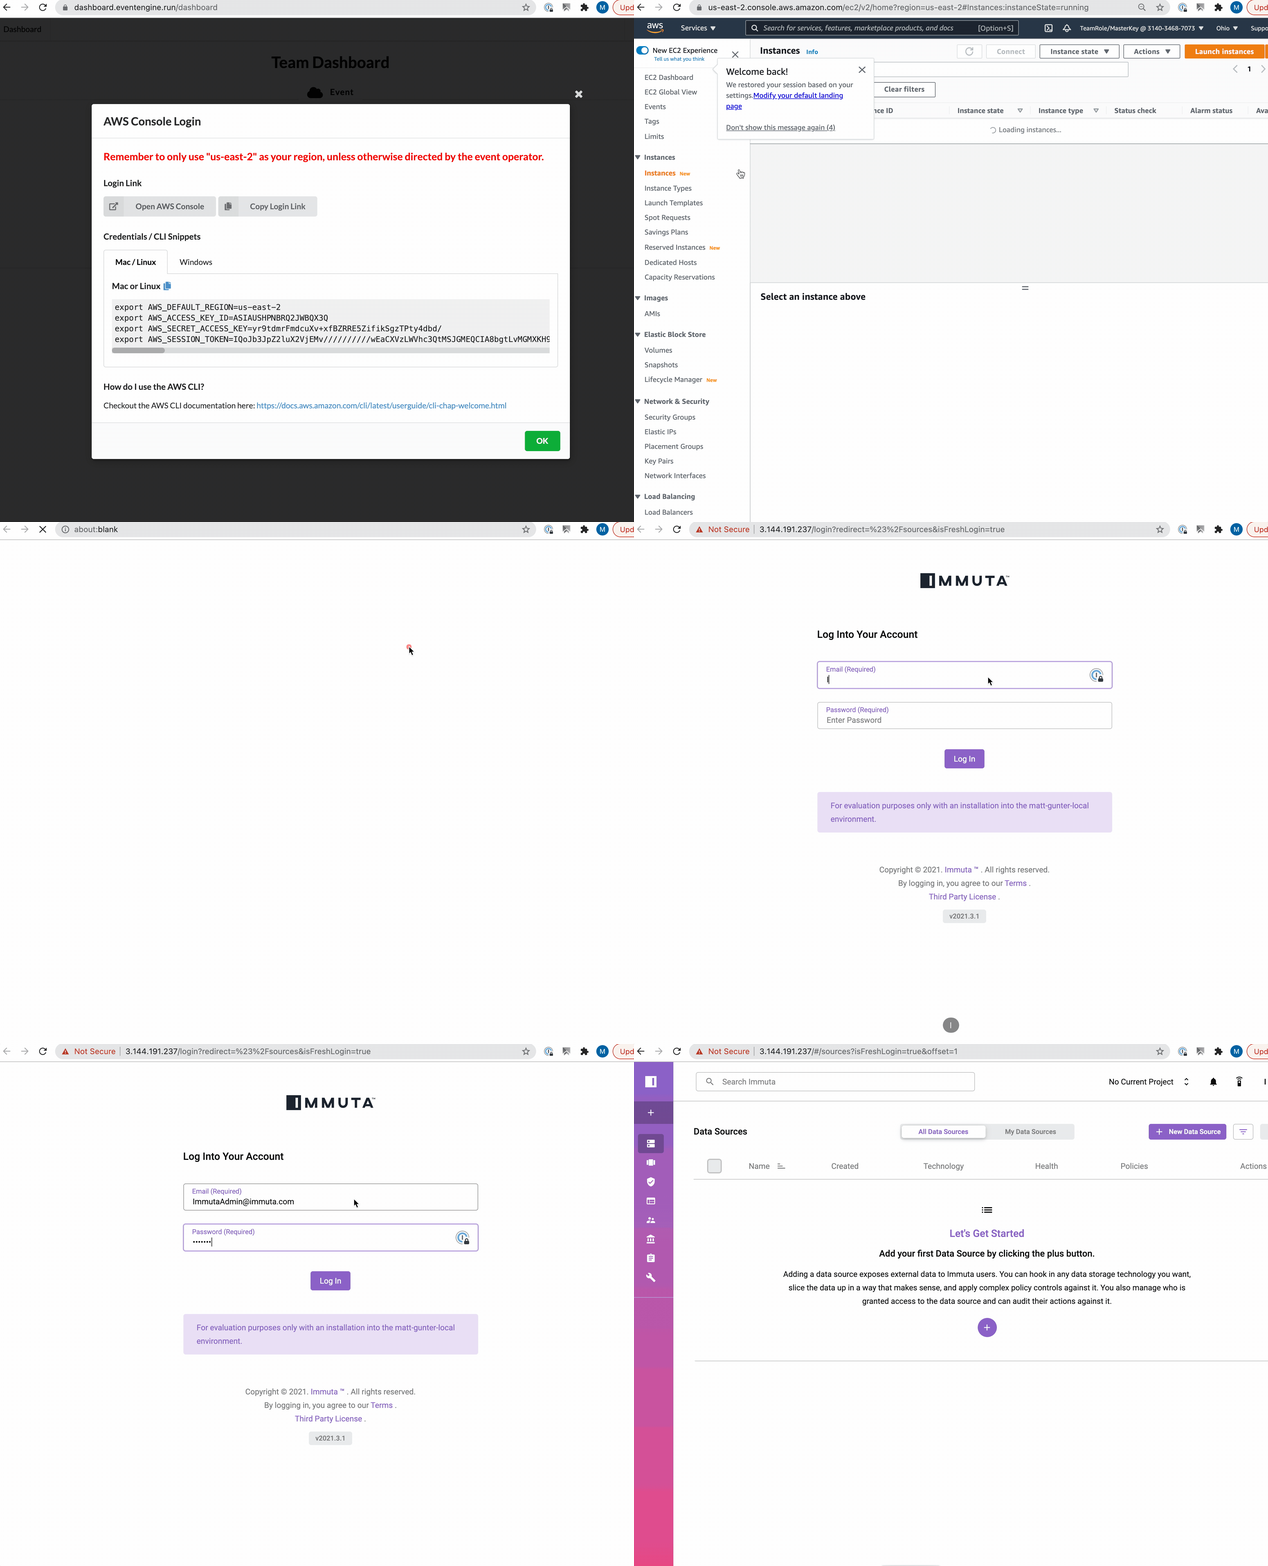 Redshift is a publicly exposed cluster, – Login with “immuta” to database “demodb” 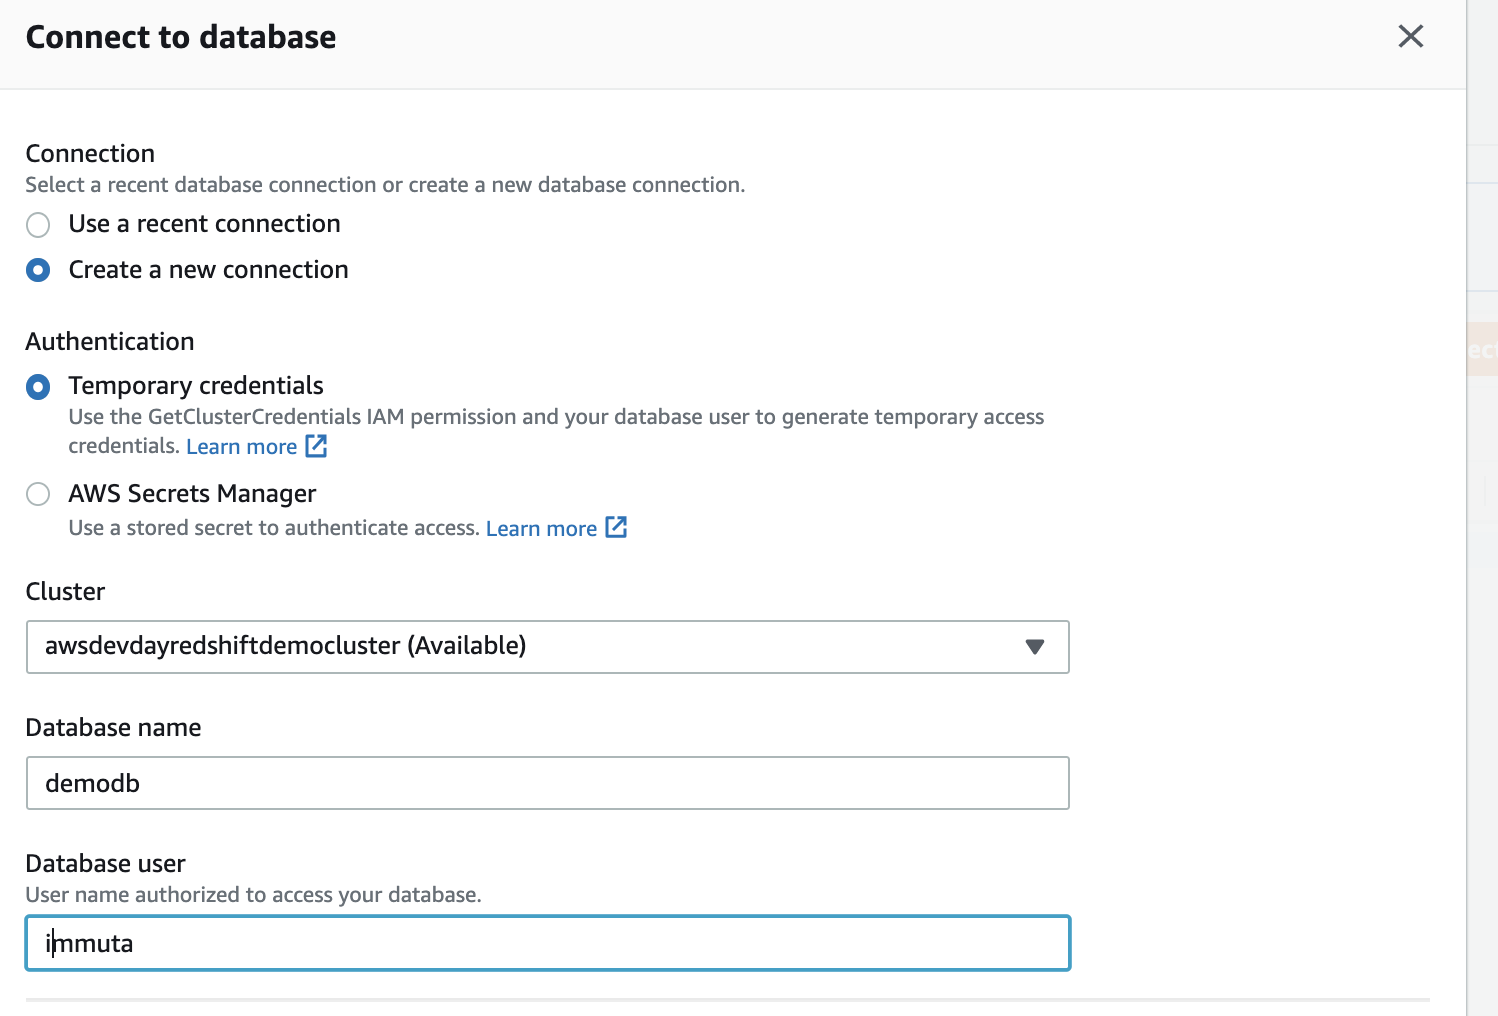 – select * from pg_catalog.pg_user to validate connectivity and that all 5 users exist 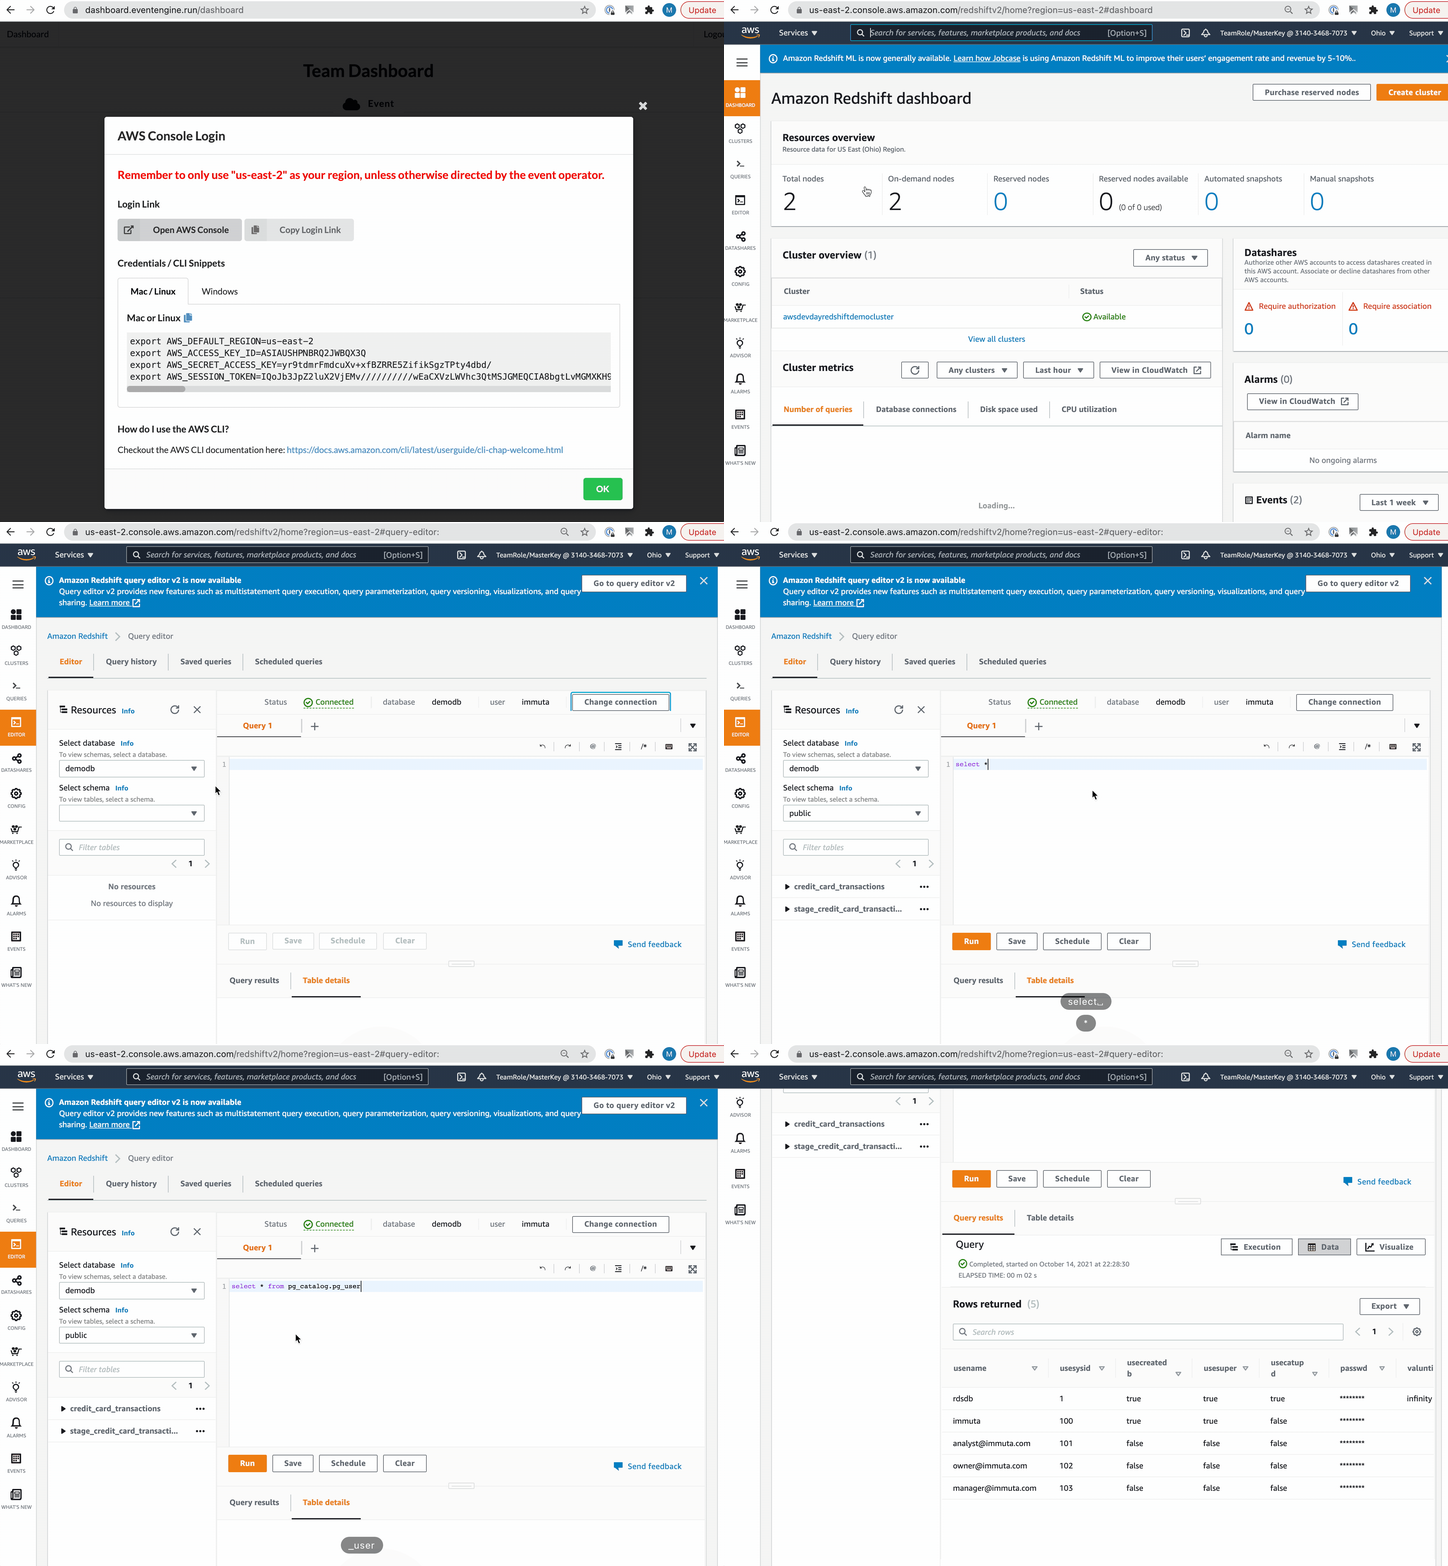 |
Throughout the Lab we will need convenient access to Urls, usernames, and passwords.
Copy the following config info into a Text Editor :
###Lab Scratchpad
Immuta Url:  [PASTE your immuta url here]

Amazon-Resource-Name for Redshift S3 Role(ARN): [PASTE your ARN here]

---

Redshift Host: [PASTE immuta url here]

Redshift port: 5439

Redshift db: demodb

Super-user[/ password]: immuta / AW$D3VdAy$

---

Immuta Admin Username [/ password]: ImmutaAdmin@immuta.com / password
Corresponding Redshift Username [/ Password ]:  immuta / AW$D3VdAy$

Immuta Analyst Username [/ password]:  analyst@immuta.com / password
Corresponding Redshift Username [/ Password ]:  analyst@immuta.com / DontGuessM3

Immuta Data Owner Username [/ password]:  owner@immuta.com / password
Corresponding Redshift Username [/ Password ]:  owner@immuta.com / DontGuessM3

Immuta Manager Username [/ password]:  manager@immuta.com / password
Corresponding Redshift Username [/ Password ]:  manager@immuta.com / DontGuessM3

---
SQL:
  Add a new column: alter table public.credit_card_transactions add column New_column varchar default 'secret';
Finish populating the scratchpad with the following 3 values that are based on your environment :
Immuta Url, Redshift Host, and Role ARN for Redshift ( For one of the statements we must reference an ARN Role. This is to allow access to our source data in S3.)
Filling-in your Scratchpad information: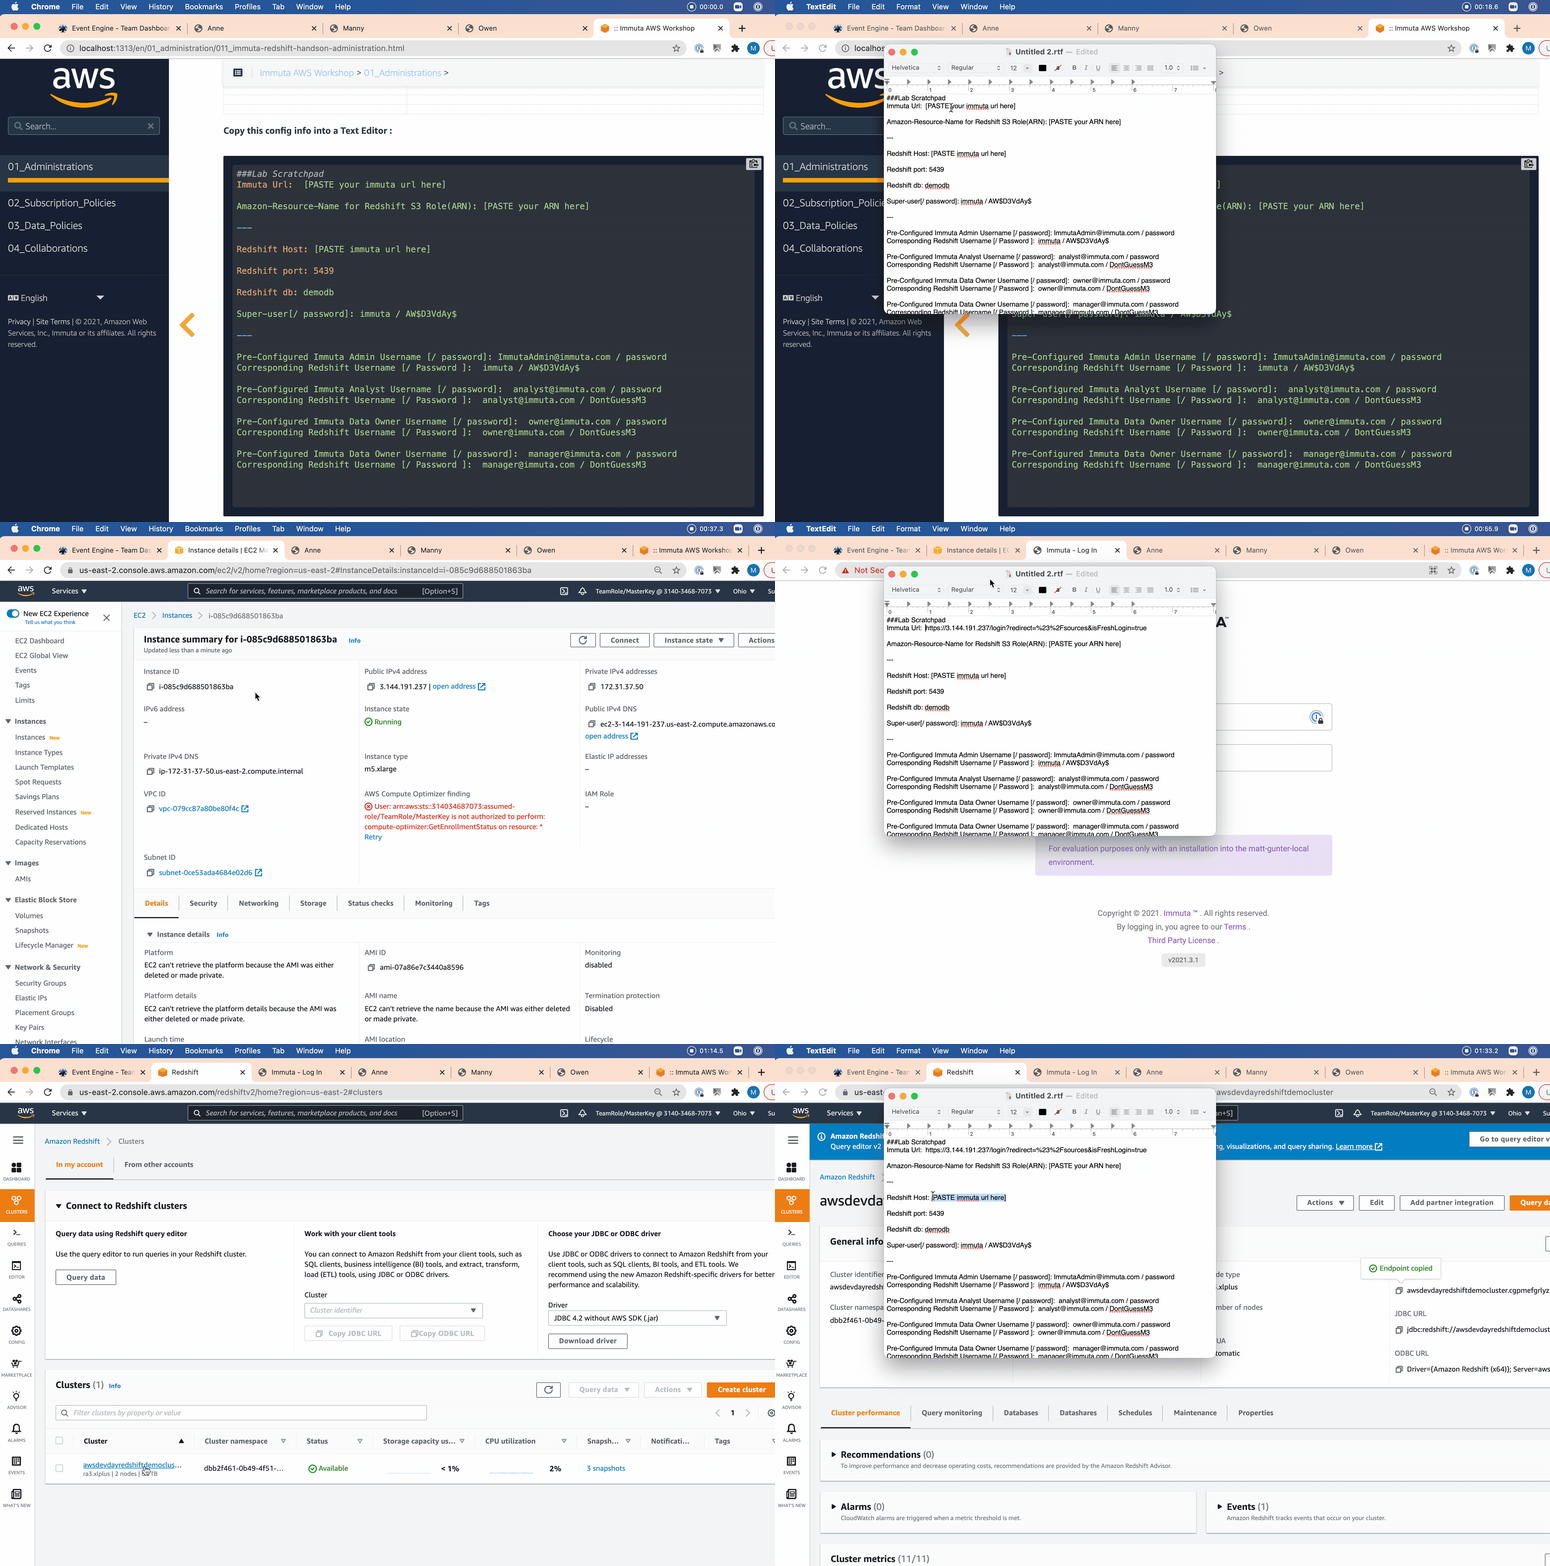
Extra details(if needed) for finding the ARN:
| Steps: | Instructions: |
|---|---|
| Find the ARN | Navigate to the Redshift Cluster page of the AWS console and view the Properties tab.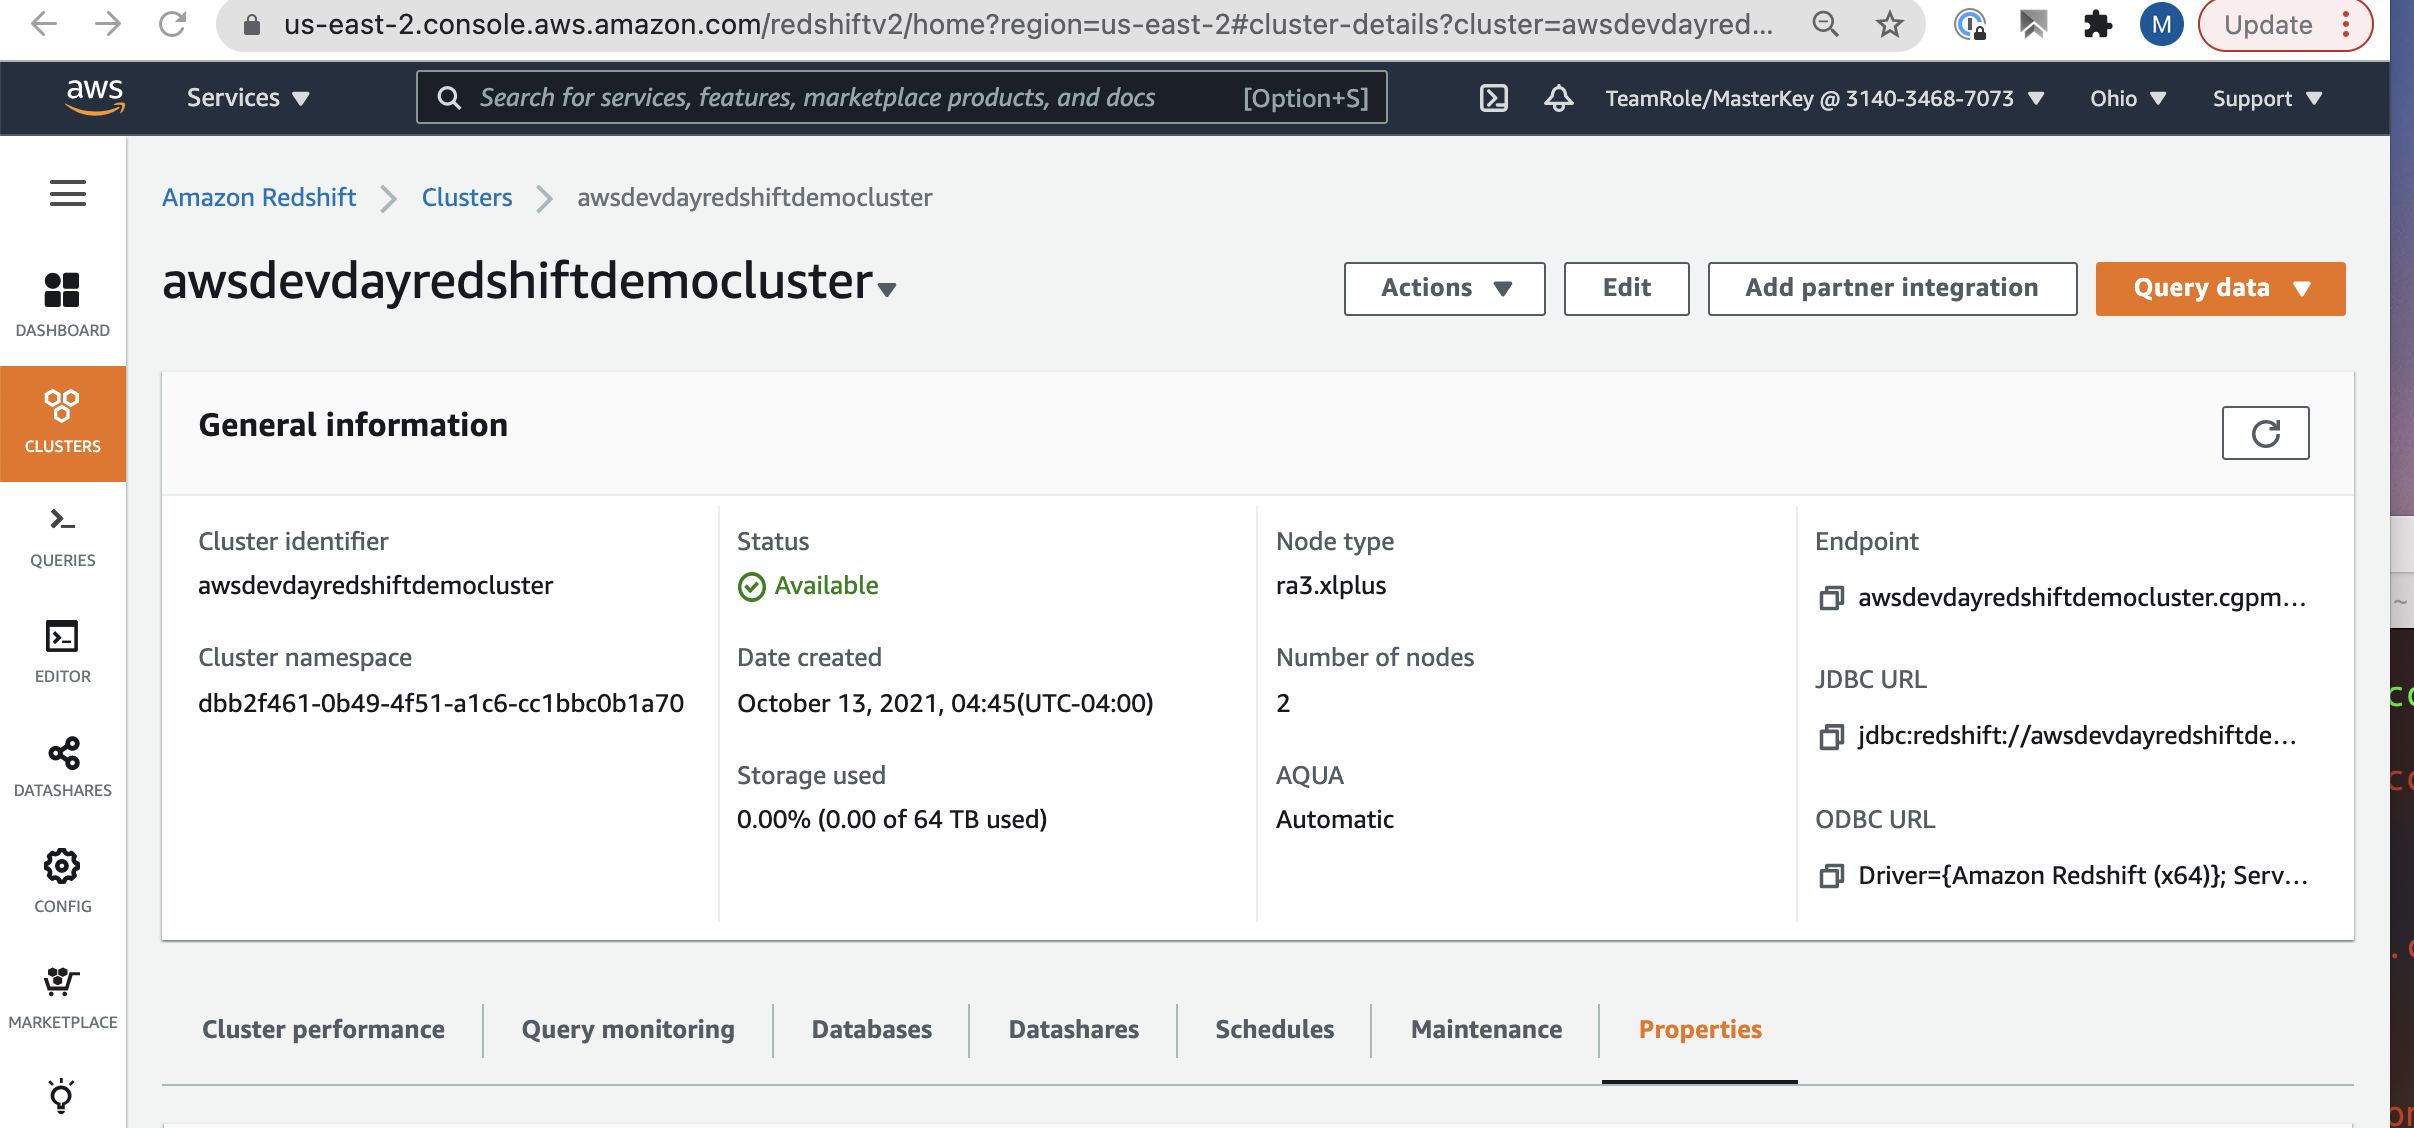 |
| Copy the ARN to your Scratchpad | Click on the copy icon  in the Cluster Permissions section in the Cluster Permissions section  |
| 1.1 Create and Populate the credit_card_transactions table in Redshift; |
|---|
For our Lab we are going to create and load 2 tables.
We will use the Redshift Query Editor to execute these SQL statements.
If your Redshift Cluster is in US-EAST1 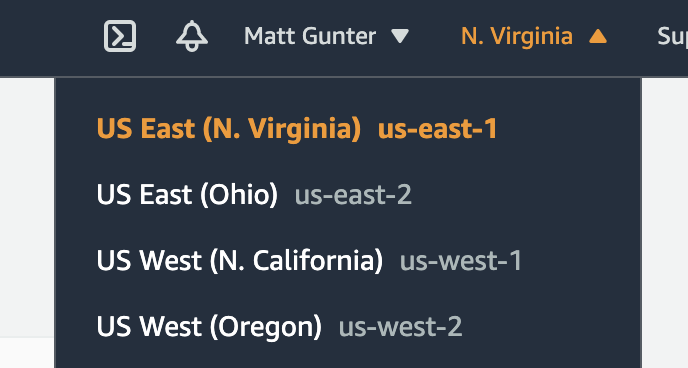 Run this Statement sequence in the SQL Editor |
|---|
--we will create two users. one is an analyst, the other is a finance user:
create user "analyst@immuta.com" password 'DontGuessM3';
create user "owner@immuta.com" password 'DontGuessM3';
create user "manager@immuta.com" password 'DontGuessM3';

grant usage on schema public to "owner@immuta.com";

CREATE TABLE public.stage_credit_card_transactions ( id character varying(256) ENCODE lzo, customer_last_name character varying(256) ENCODE lzo, credit_card_number character varying(256) ENCODE lzo, transaction_location character varying(256) ENCODE lzo, transaction_time character varying(256) ENCODE lzo, transaction_amount character varying(256) ENCODE lzo, transaction_country character varying(256) ENCODE lzo ) DISTSTYLE AUTO;

--this is a public s3 bucket where the raw data lives. Make sure you register an IAM role to your Redshift cluster and then use that arn id in the below copy from:


COPY public.stage_credit_card_transactions
 FROM 's3://immuta-sa-team/public/aws_dev_day/datasets/credit_card_transactions.snappy.parq' FORMAT as PARQUET
 IAM_ROLE 'PASTE_YOUR_ARN_HERE' ;

CREATE TABLE public.credit_card_transactions as (select cast(id as bigint) id, customer_last_name , credit_card_number, transaction_location , cast(transaction_time as timestamp) transaction_time, cast(transaction_amount as decimal(18,2)) transaction_amount , transaction_country from  public.stage_credit_card_transactions );

GRANT ALL PRIVILEGES ON TABLE public.credit_card_transactions to "owner@immuta.com";
If your Redshift Cluster is in US-EAST2 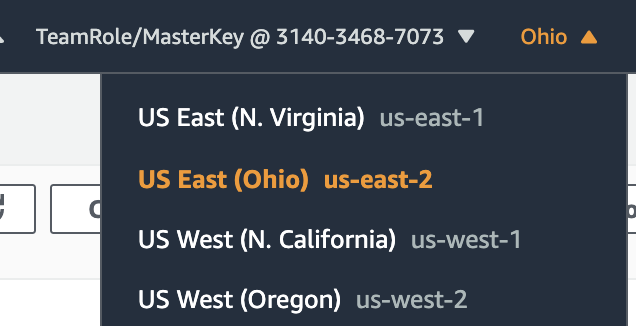 Run this Statement sequence in the SQL Editor |
|---|
--we will create two users. one is an analyst, the other is a finance user:
create user "analyst@immuta.com" password 'DontGuessM3';
create user "owner@immuta.com" password 'DontGuessM3';
create user "manager@immuta.com" password 'DontGuessM3';

grant usage on schema public to "owner@immuta.com";

CREATE TABLE public.stage_credit_card_transactions ( id character varying(256) ENCODE lzo, customer_last_name character varying(256) ENCODE lzo, credit_card_number character varying(256) ENCODE lzo, transaction_location character varying(256) ENCODE lzo, transaction_time character varying(256) ENCODE lzo, transaction_amount character varying(256) ENCODE lzo, transaction_country character varying(256) ENCODE lzo ) DISTSTYLE AUTO;

--this is a public s3 bucket where the raw data lives. Make sure you register an IAM role to your Redshift cluster and then use that arn id in the below copy from:


COPY public.stage_credit_card_transactions
 FROM 's3://immuta-sa-public/credit_card_transactions.snappy.parq' FORMAT as PARQUET
 IAM_ROLE 'PASTE_YOUR_ARN_HERE' ;

CREATE TABLE public.credit_card_transactions as (select cast(id as bigint) id, customer_last_name , credit_card_number, transaction_location , cast(transaction_time as timestamp) transaction_time, cast(transaction_amount as decimal(18,2)) transaction_amount , transaction_country from  public.stage_credit_card_transactions );

GRANT ALL PRIVILEGES ON TABLE public.credit_card_transactions to "owner@immuta.com";
Use the Redshift SQL Editor to validate that the data was loaded Successfully
select * from public.credit_card_transactions;Use the SQL Editor to validate that the users were created Successfully
select * from pg_catalog.pg_user;| 1.3 Configure Immuta’s Native Integration with Redshift |
|---|
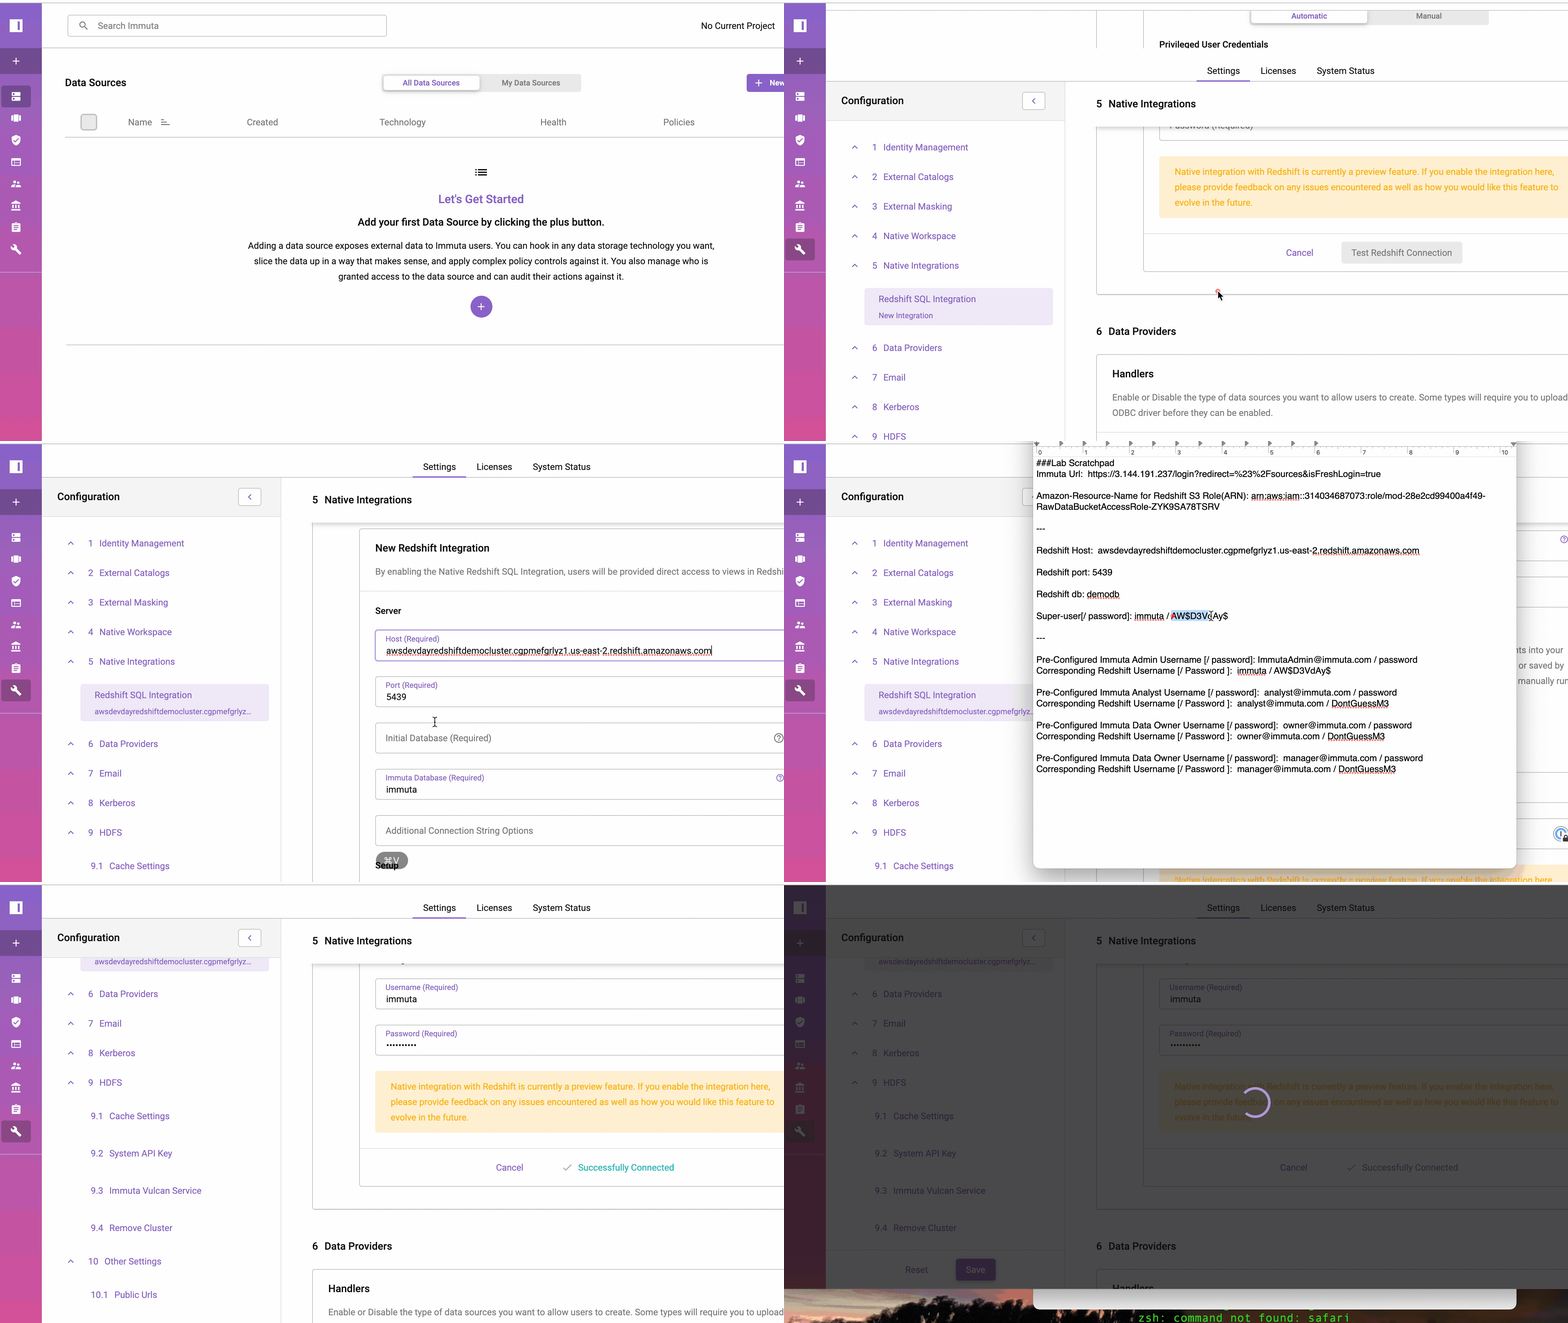
 In the above section we loaded Data and created Users in Redshift. In order for Immuta to Control Access to this data transparently, an integration step is required.
To complete this Native Integration configuration you will need the Redshift Host, Port and Database.
Review the clip below to see how to complete the following steps:
Log in to Immuta as Immuta@admin.
Click the App Settings icon in the left sidebar (the wrench).
Under the Configuration menu on the left, click Native integrations.
Click the + Add Native Integration button and select Redshift.
Enter the Redshift host.
Enter the Redshift port.
Enter the initial database. We can use demodb; (it doesn’t really matter which. Immuta simply needs this because you must include a database when connecting to Redshift.)
Enter the Immuta Database: immuta. This is the database name where all the secure schemas and views Immuta creates will be stored.
Immuta will automatically install the necessary procedures, functions, and system accounts into your Redshift account.
Select Automatic and Enter
- Enter Immuta
- Enter ‘AW$D3VdAy$’
Immuta Native Integration:
